Pionex Open Account
In the dynamic world of cryptocurrency trading, access to a reliable and secure trading platform is fundamental. Pionex, also known as Pionex Global, is a cryptocurrency exchange renowned for its features and benefits. If you're considering joining the Pionex community, this step-by-step guide to registration will help you get started on your journey to exploring the exciting world of digital assets, shedding light on why it has become a preferred choice for crypto enthusiasts.

How to Open a Pionex Account with Phone Number or Email
1. Go to Pionex and click [Sign up].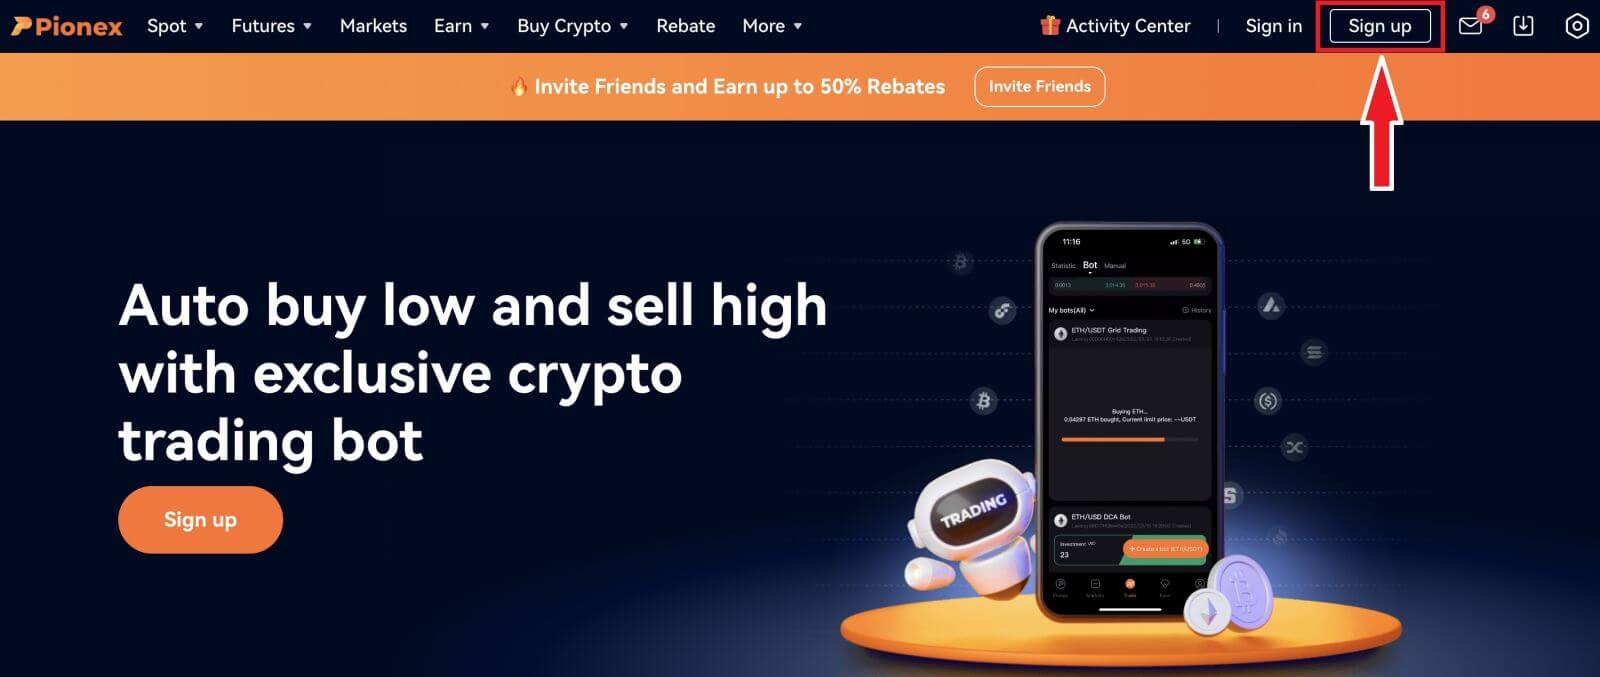
2. Select a registration method. You can sign up with your email address, phone number, Apple account or Google account.
Please select the type of account carefully. Once registered, you cannot change the account type.
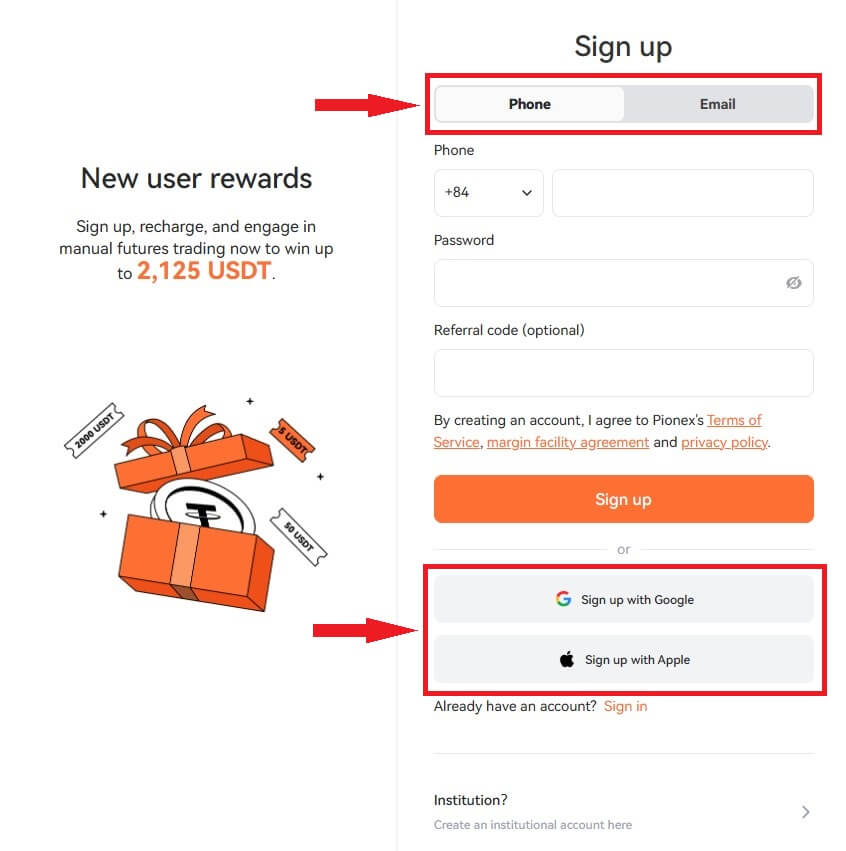
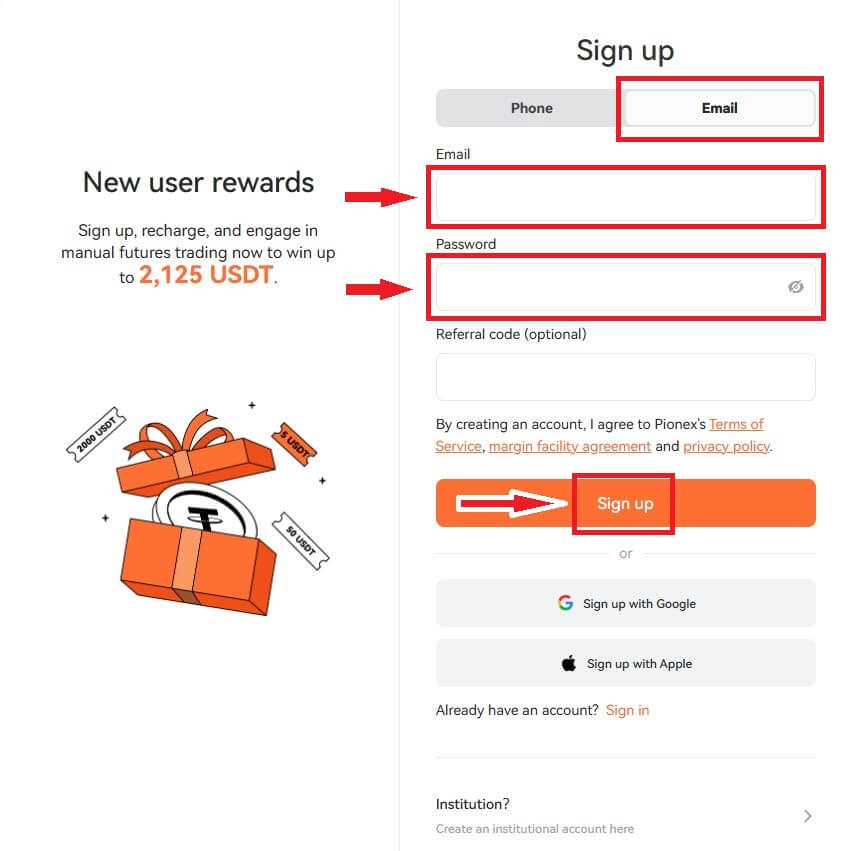
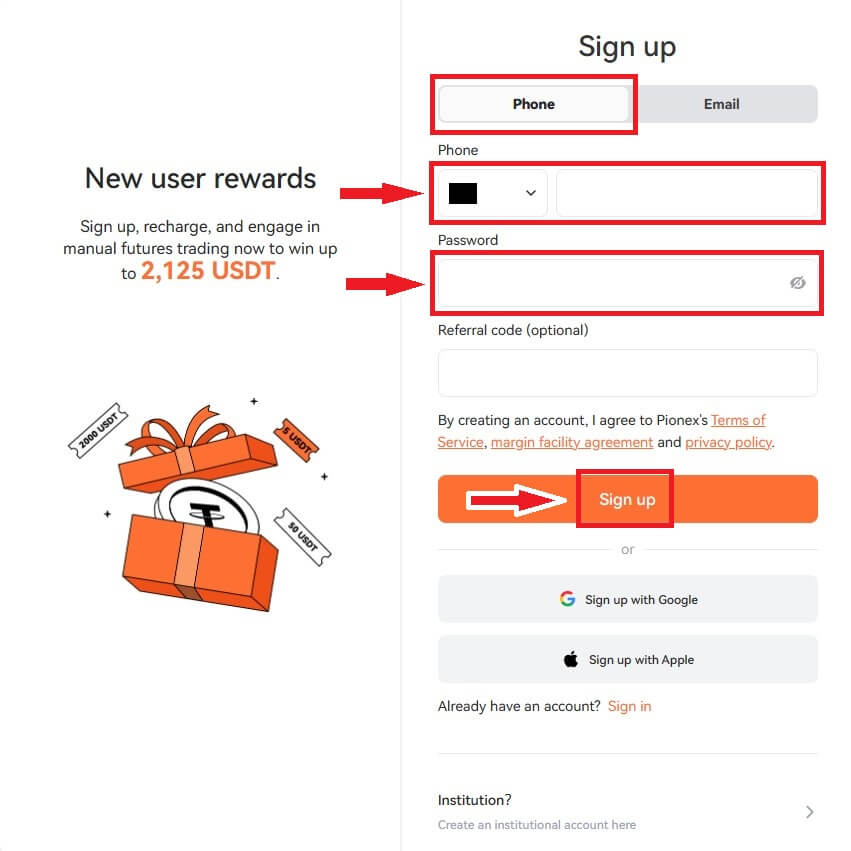
3. Select [Email] or [Phone Number] and enter your email address/phone number. Then, create a secure password for your account.
Note: Your password must contain at least 8 characters, including letters and numbers.
Read the Terms of Service, margin facility agreement and privacy policy, then click [Sign up].
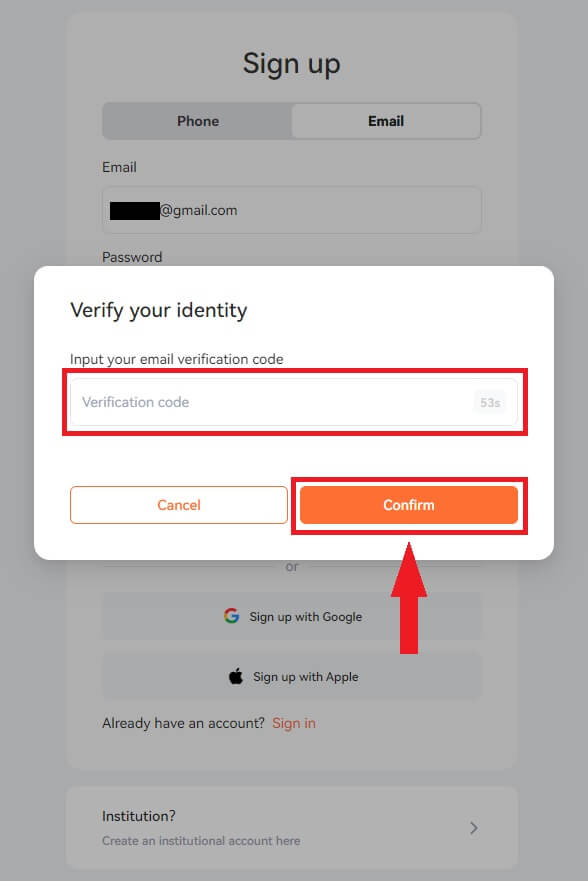
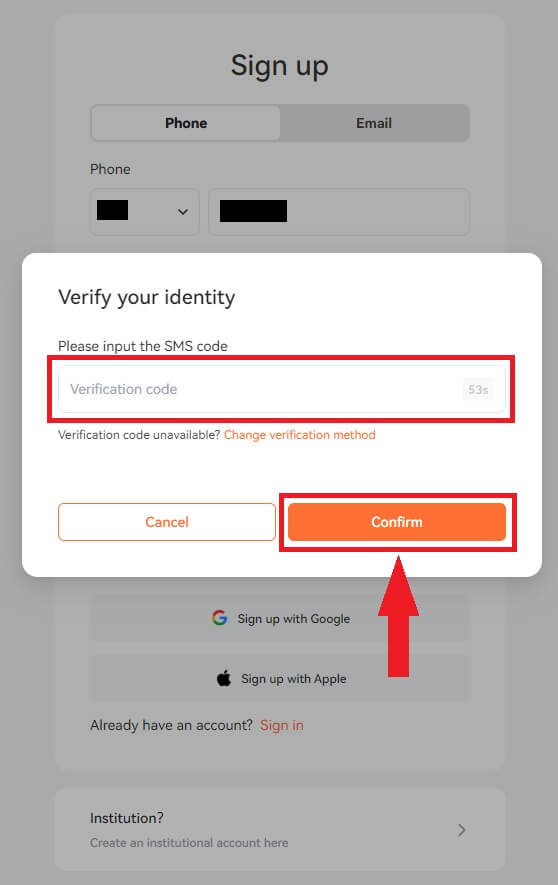
4. You will receive a 6-digit verification code in your email or phone. Enter the code within 60 seconds and click [Confirm].
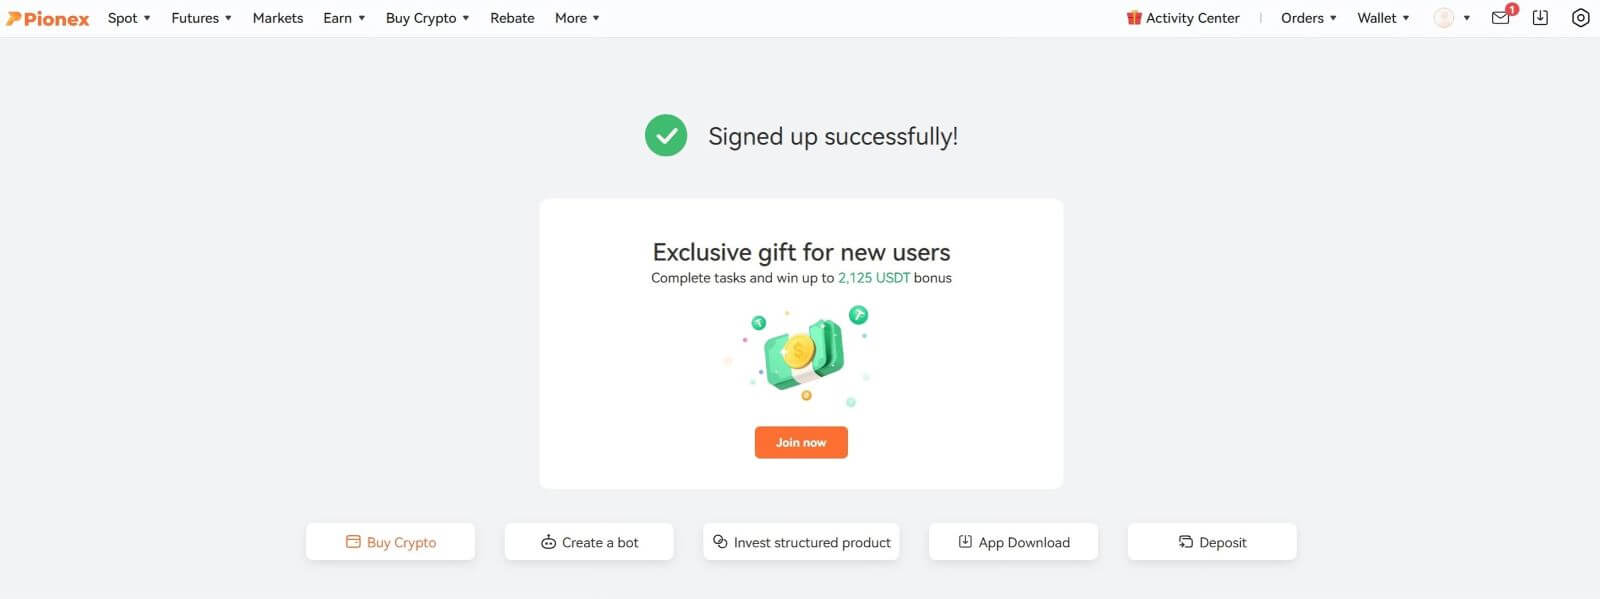
5. Congratulations, you have successfully registered on Pionex.
How to Open a Pionex Account with Apple
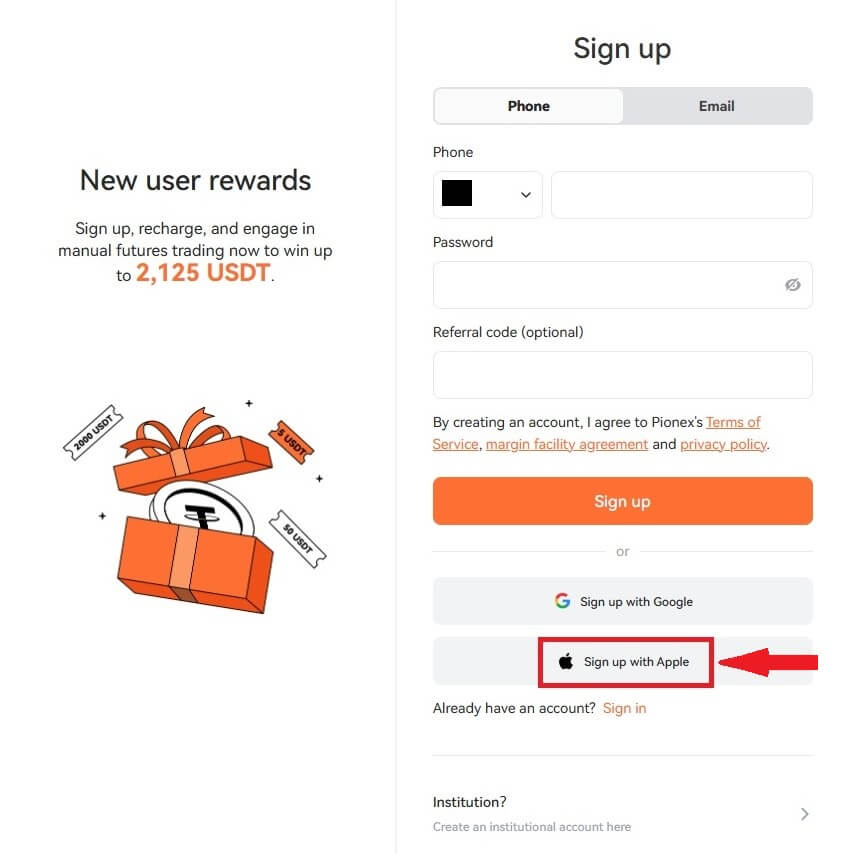
1. Alternatively, you can sign up using Single Sign-On with your Apple account by visiting Pionex and clicking [Sign up].
2. Select [Sign up with Apple], a pop-up window will appear, and you will be prompted to sign in to Pionex using your Apple account.
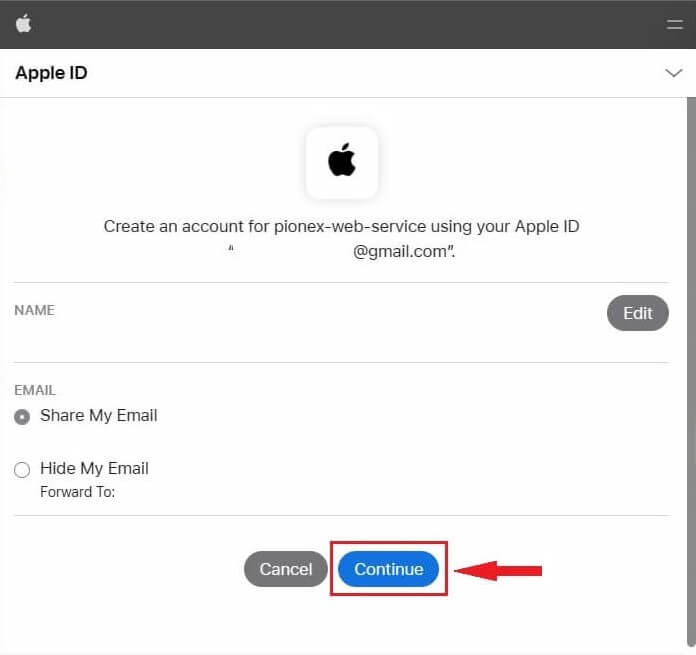
3. Enter your Apple ID and password to sign in to Pionex.
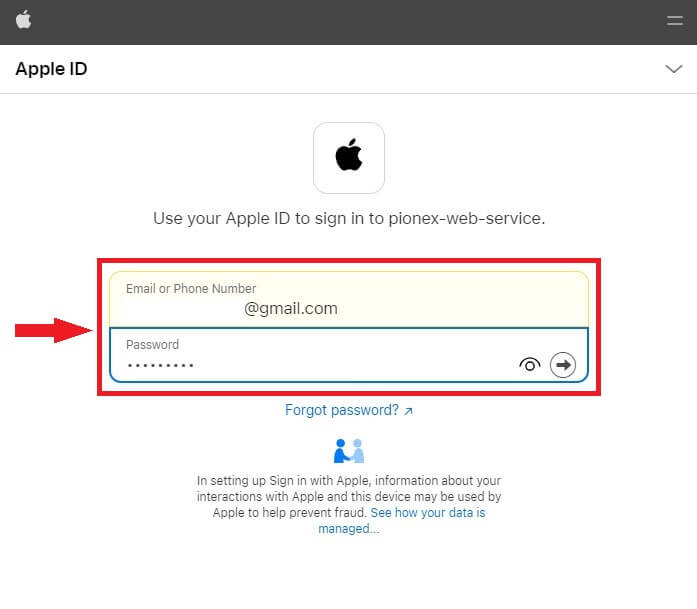
Click "Continue".
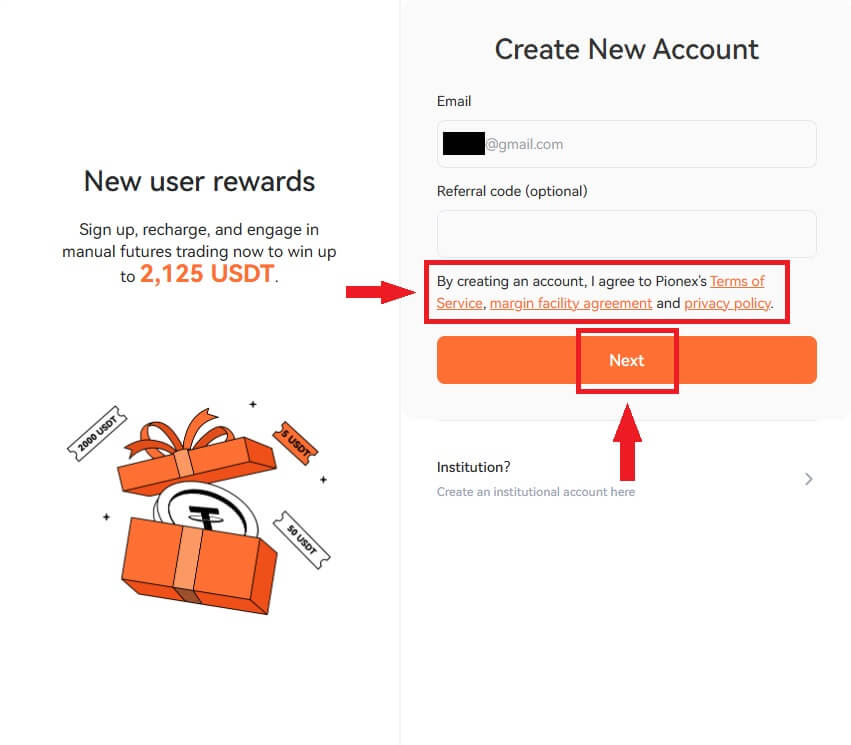
4. After signing in, you will be redirected to the Pionex website.
Read the Terms of Service, margin facility agreement and privacy policy, then click [Next].
5. Congratulations! You have successfully created a Pionex account.

How to Open a Pionex Account with Google
Moreover, you can create a Pionex account through Gmail. If you wish to do that, please follow these steps:1. Firstly, you’ll need to head over to the Pionex homepage and click [Sign up].

2. Click on the [Sign up with Google] button.
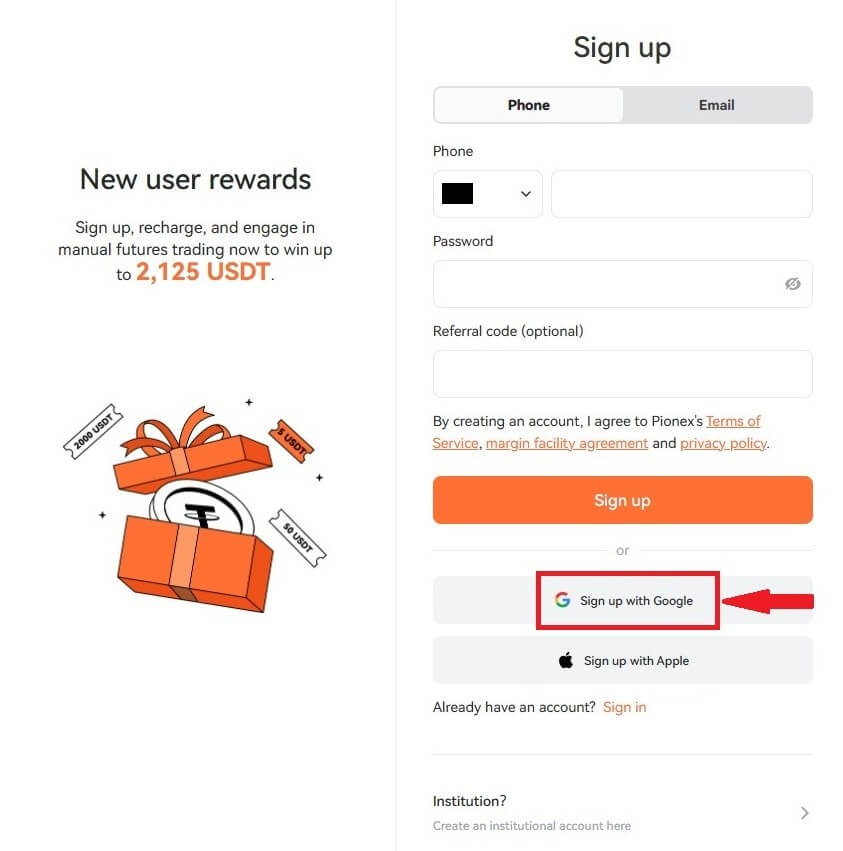
3. A sign-in window will be opened, where you will need to enter your Email address or Phone number and click on “Next”.
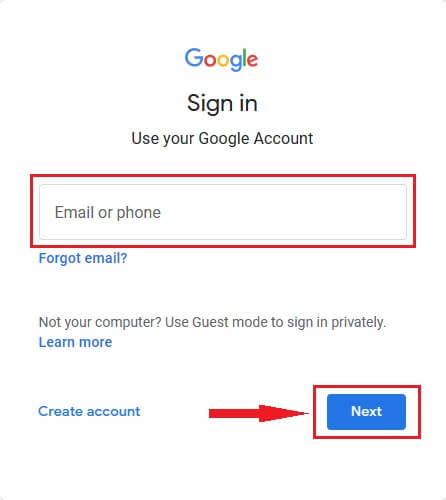
4. Then enter the password for your Gmail account and click “Next”.
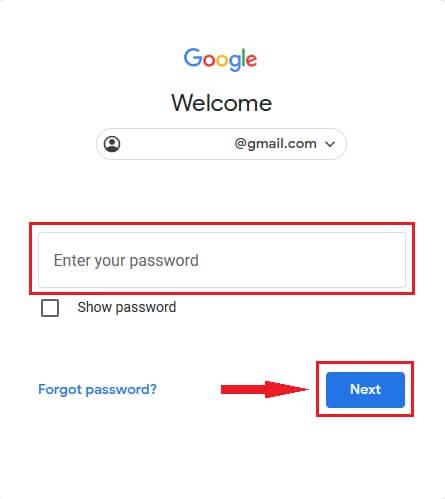
5. After signing in, you will be redirected to the Pionex website.
Read the Terms of Service, margin facility agreement and privacy policy, then click [Next].

6. Congratulations! You have successfully created a Pionex account.

How to Open an Account on Pionex App
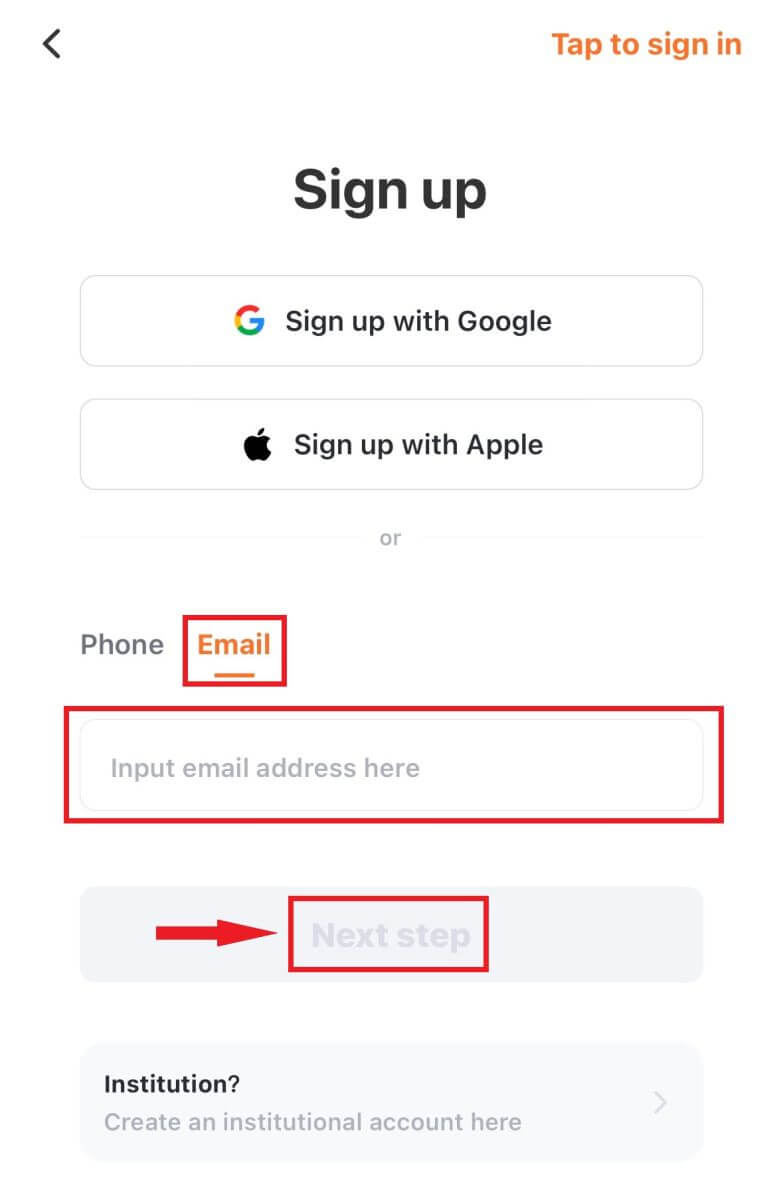
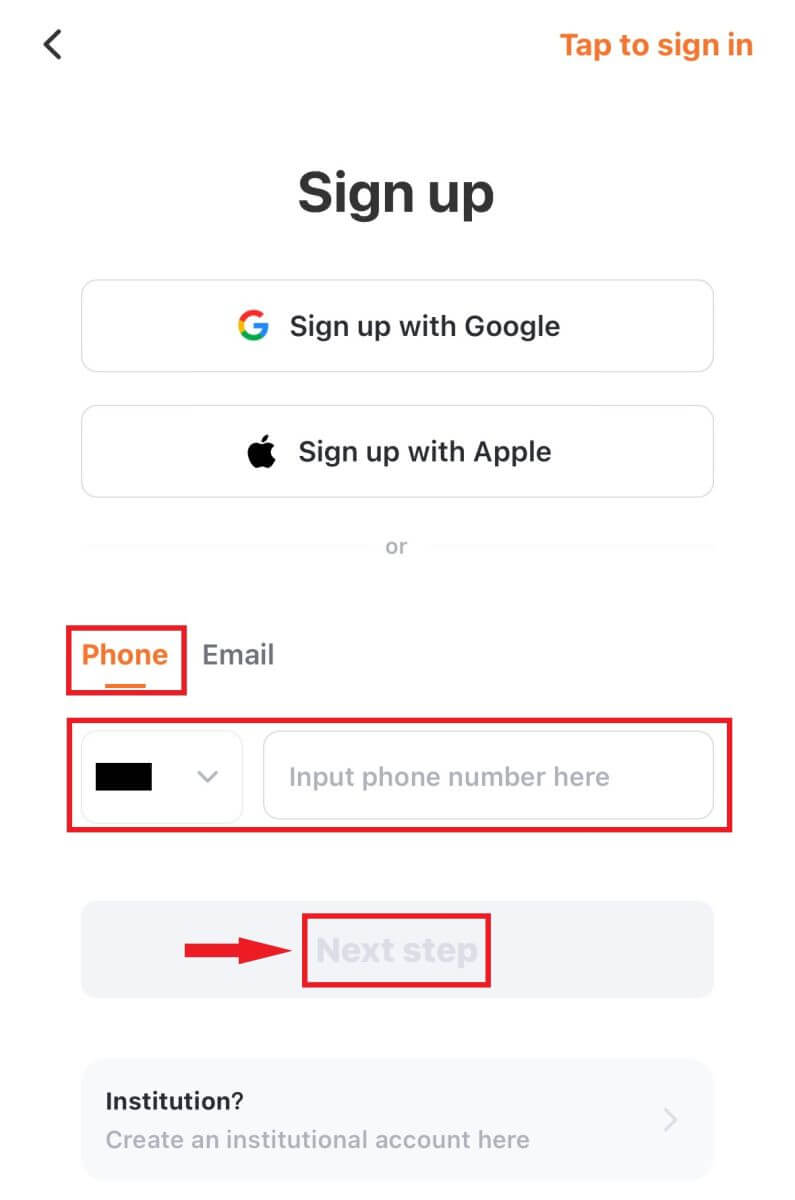
You can register for a Pionex account with your email address, phone number, or your Apple/Google account on the Pionex App easily with a few taps.1. Open the Pionex App, tap Account at the bottom corner then tap [Sign up].

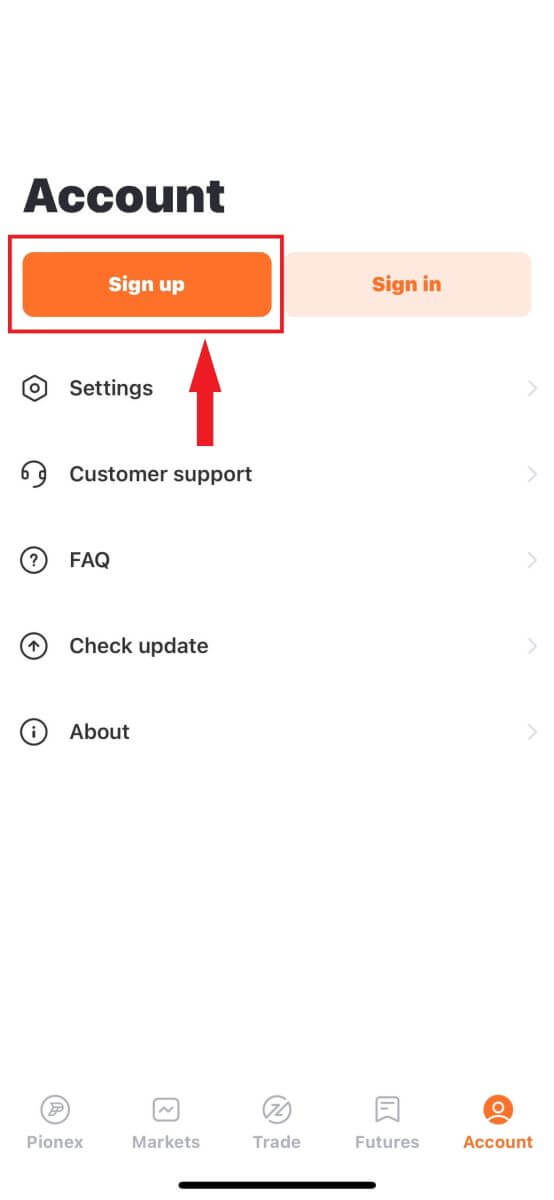
2. Select a registration method.
Please select the type of account carefully. Once registered, you cannot change the account type.
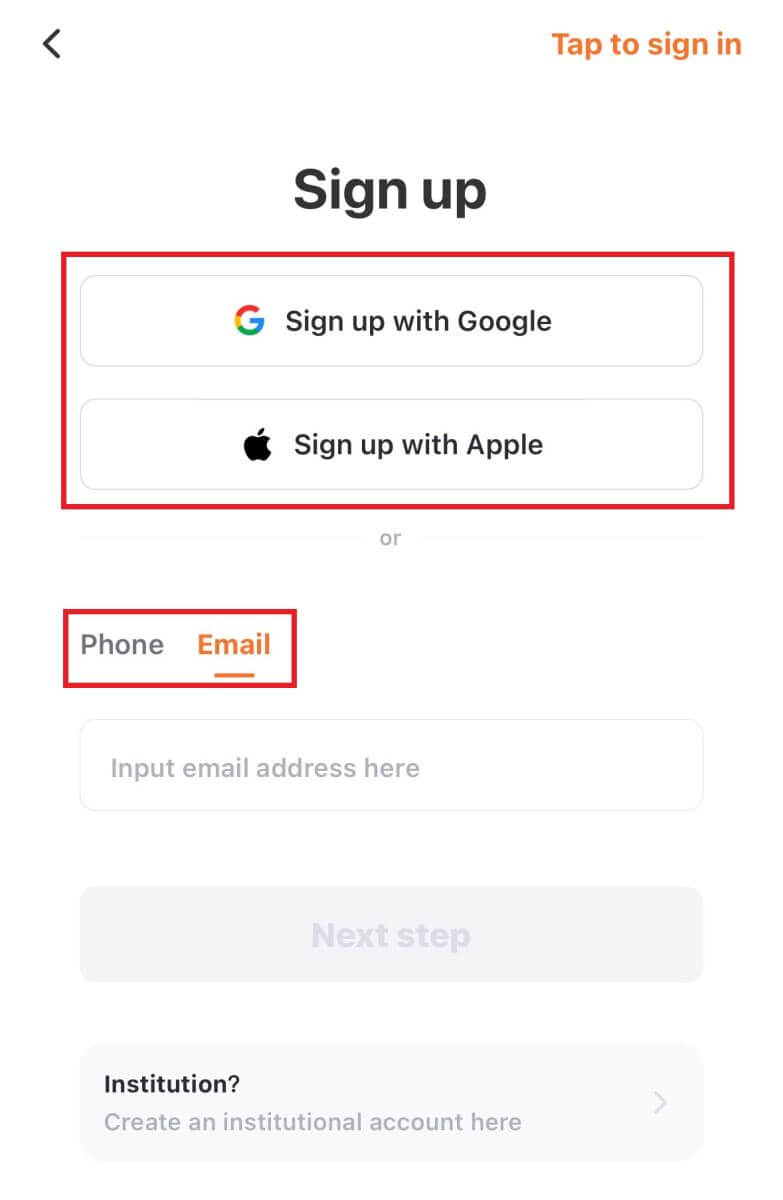
Sign up with your email/phone number:
3. Select [Email] or [Phone Number], enter your email address/phone number and tap [Next step].
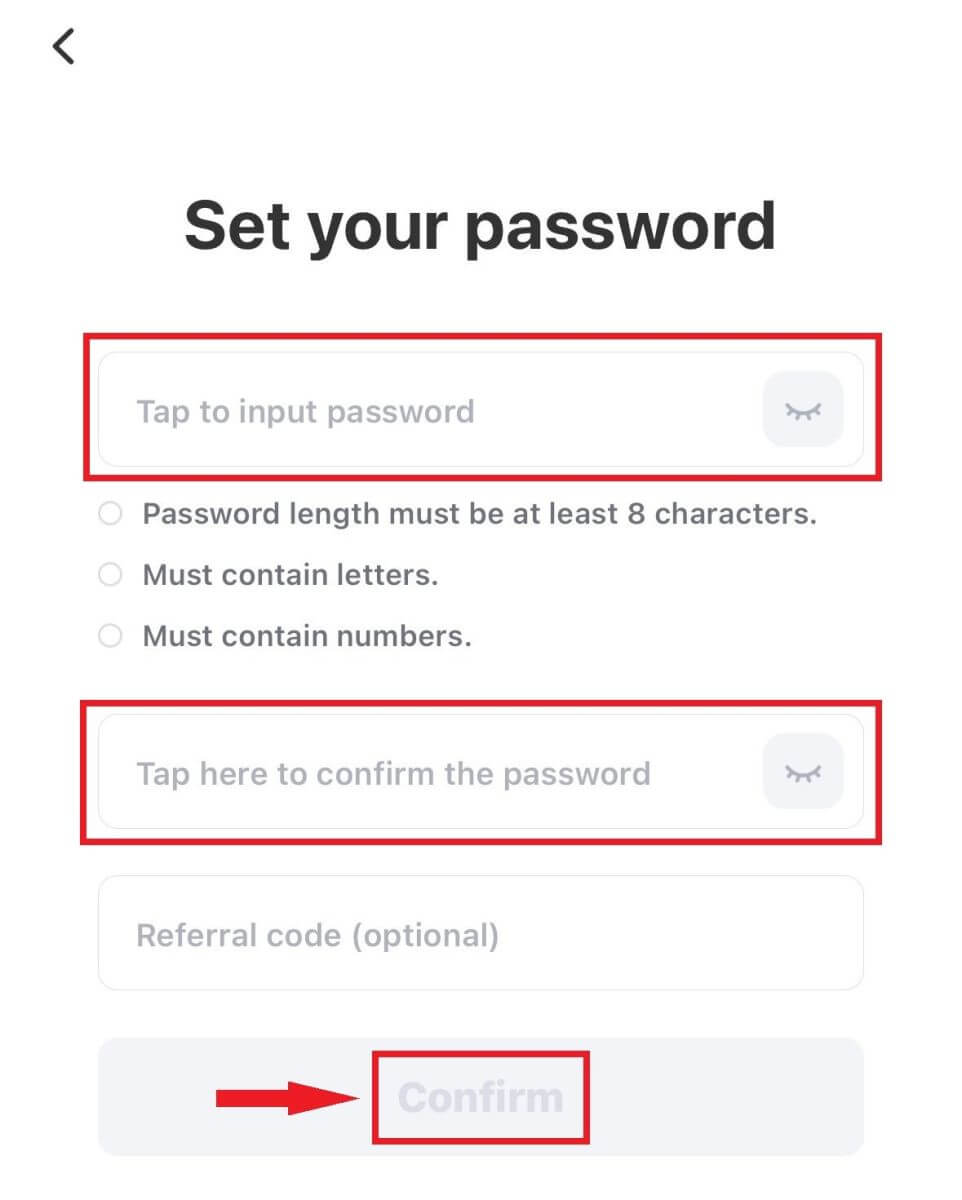
Then, set up a secure password for your account. Type your password again for the confirmation and tap [Confirm].
Note: Your password must contain at least 8 characters, including letters and numbers.
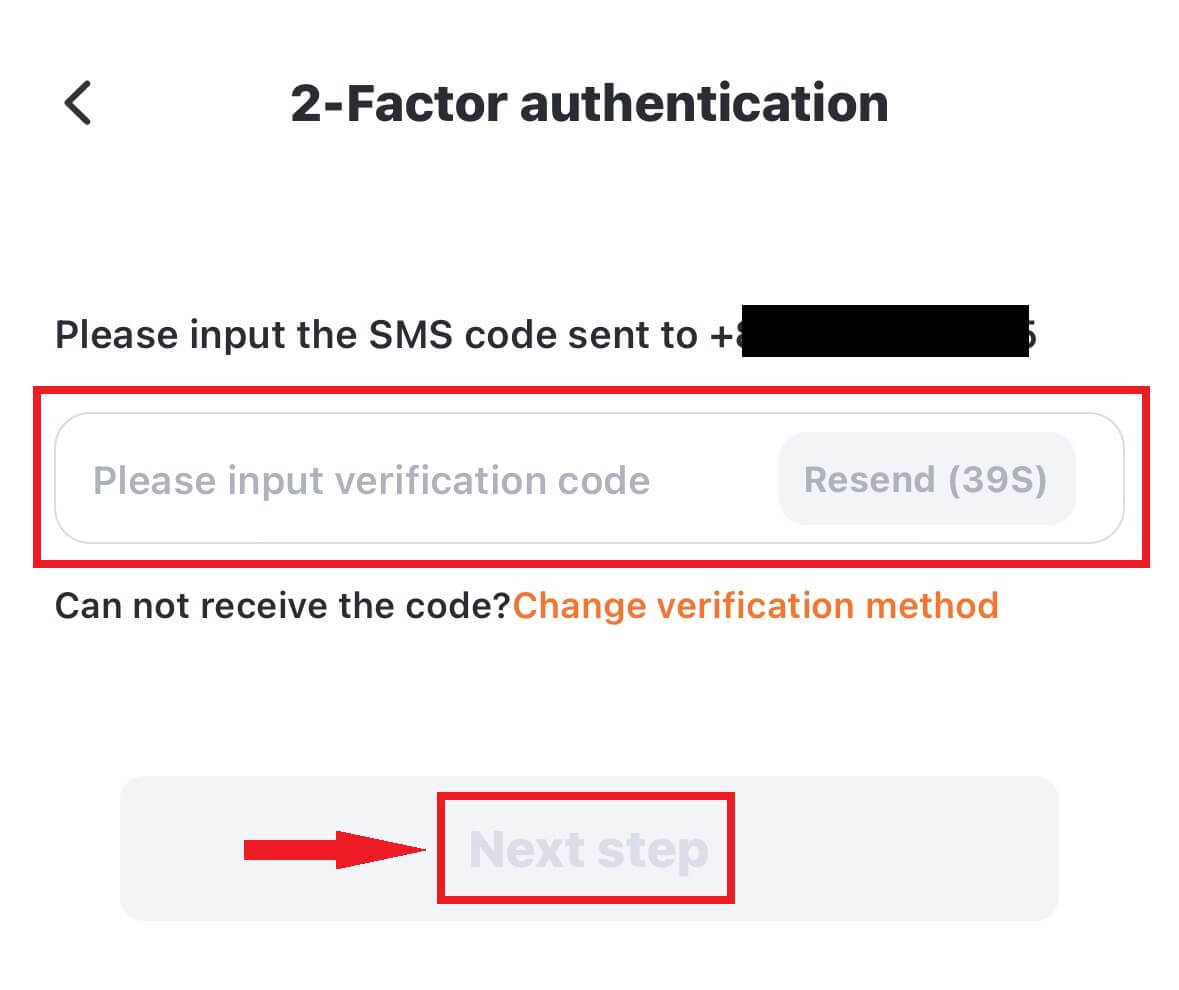
4. You will receive a 6-digit verification code in your email or phone. Enter the code within 60 seconds and click [Next step].
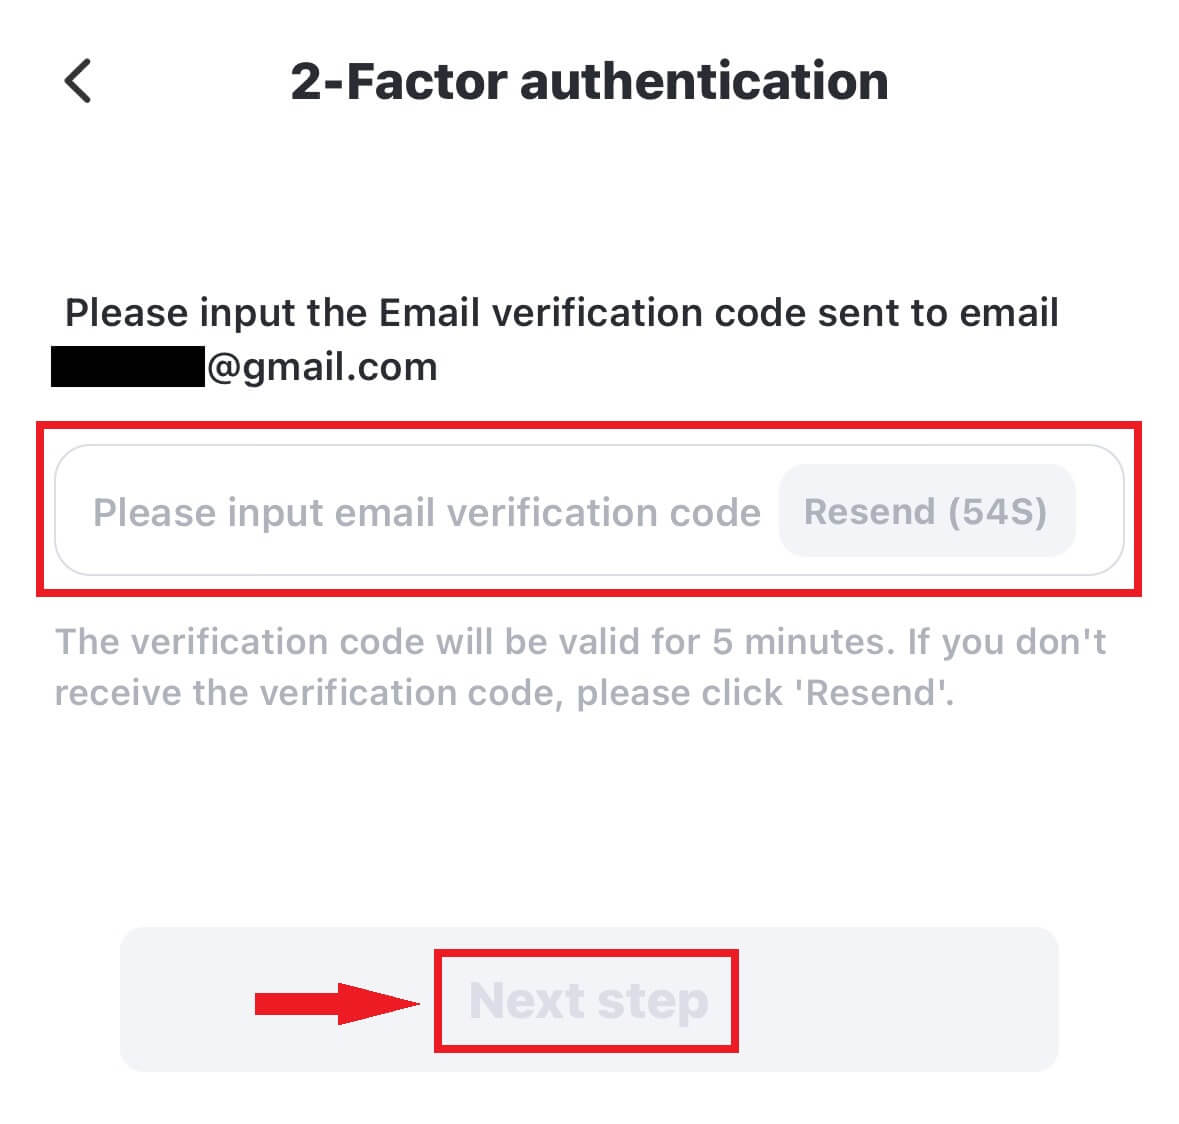
5. Congratulations! You have successfully created Pionex account.
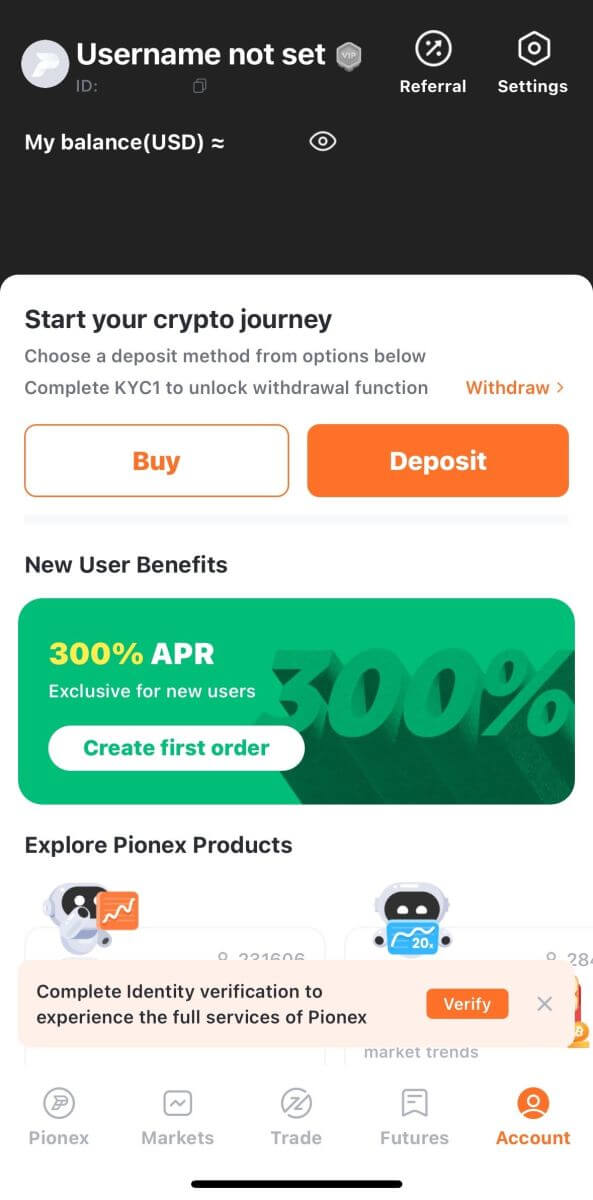
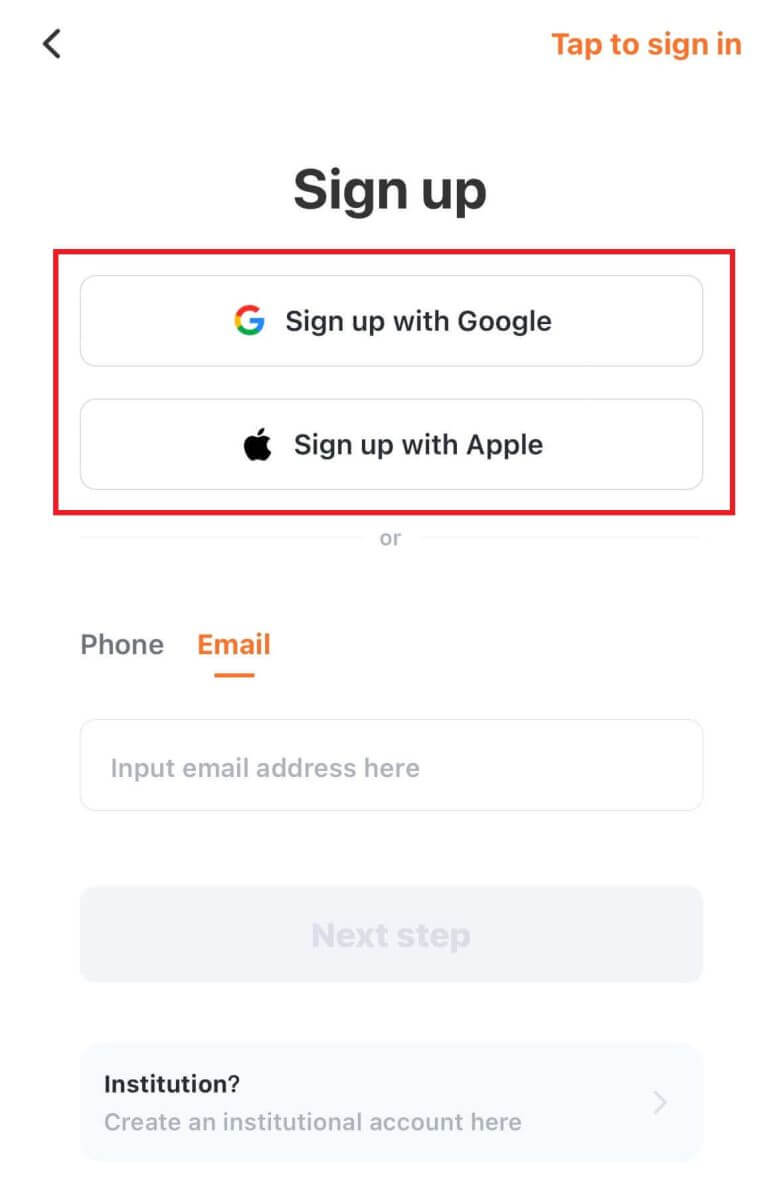
Sign up with your Apple/Google account:
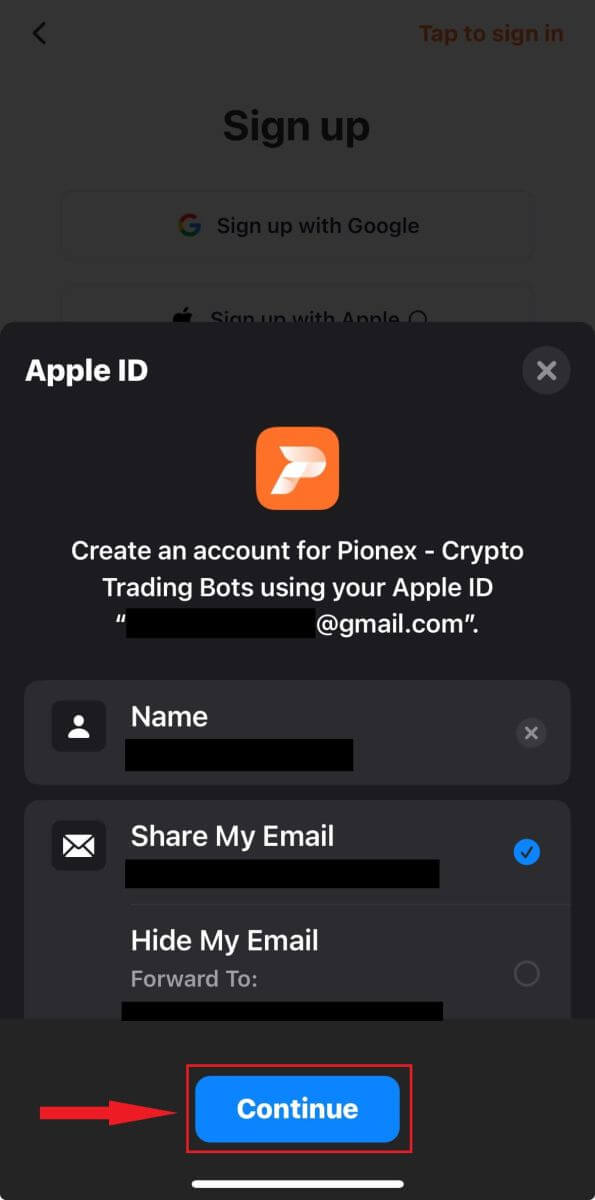
3. Select [Sign up with Apple] or [Sign up with Google]. You will be prompted to sign in to Pionex using your Apple or Google account.
Tap [Continue].
4. Congratulations! You have successfully created Pionex account.

Note:
- To protect your account, we highly recommend enabling at least 1 two-factor authentication (2FA).
- Please note that you must complete Identity Verification to experience the full services of Pionex.
Frequently Asked Questions (FAQ)
Why Can’t I Receive Emails from Pionex
If you are not receiving emails sent from Pionex, please follow the instructions below to check your email’s settings:1. Are you logged in to the email address registered to your Pionex account? Sometimes you might be logged out of your email on your devices and hence can’t see Pionex’s emails. Please log in and refresh.
2. Have you checked the spam folder of your email? If you find that your email service provider is pushing Pionex emails into your spam folder, you can mark them as “safe” by whitelisting Pionex’s email addresses. You can refer to How to Whitelist Pionex Emails to set it up.
Addresses to whitelist:
- [email protected]
- [email protected]
- [email protected]
- [email protected]
- [email protected]
- [email protected]
- [email protected]
- [email protected]
- [email protected]
- [email protected]
- [email protected]
- [email protected]
- [email protected]
- [email protected]
- [email protected]
4. Is your email inbox full? If you have reached the limit, you won’t be able to send or receive emails. You can delete some of the old emails to free up some space for more emails.
5. If possible, register from common email domains, such as Gmail, Outlook, etc.
Why Can’t I Receive SMS Verification Codes
Pionex continuously improves our SMS Authentication coverage to enhance user experience. However, there are some countries and areas currently not supported.If you cannot enable SMS Authentication, please refer to our Global SMS coverage list to check if your area is covered. If your area is not covered on the list, please use Google Authentication as your primary two-factor authentication instead.
If you have enabled SMS Authentication or you are currently residing in a country or area that’s in our Global SMS coverage list, but you still cannot receive SMS codes, please take the following steps:
- Ensure that your mobile phone has a good network signal.
- Disable your anti-virus and/or firewall and/or call blocker apps on your mobile phone that might potentially block our SMS Code number.
- Restart your mobile phone.
- Try voice verification instead.
- Reset SMS Authentication.


